Ubuntu 18.04 LTS Bionic Beaver shows promise being the latest LTS offering from Canonical after its initial release this year. So now, after installing the latest Ubuntu 18.04 LTS Bionic beaver version on your system, it’s time to set things up. Here is our top list of the important things that you should do after installing this open source OS.
Things To Do After Installing Ubuntu 18.04 LTS
Canonical has officially moved away from the Unity desktop to the GNOME desktop environment. Though changes are in order, much of the things such as Dock and Top Panel remain the same familiar simple and elegant components. Ubuntu is the most popular one among the different Linux distributions. So here’s our list of things to do after installing Ubuntu which has the GNOME desktop as the default. So users with Kubuntu and Lubuntu must keep in mind that some of these steps might not work in anything other than GNOME desktops.
Do keep in mind that this is not something which can be mandatory for all kinds of users. Hence, we would recommend you to weigh your needs and choose the ones that you would find helpful and continue accordingly.
1. Check For Updates
First things first — check if your machine is running the latest components and features provided. Just as with the likes of all major Linux distributions, we would always recommend this step to help your system with some fixes and additional security features which may have already been released. Owing to the brilliant support for the Ubuntu community, regular updates are a thing.
So as soon as you finish installing your Ubuntu 18.04 Linux distribution, one of the important things to do is to fire up your Software Updater and check for updates.
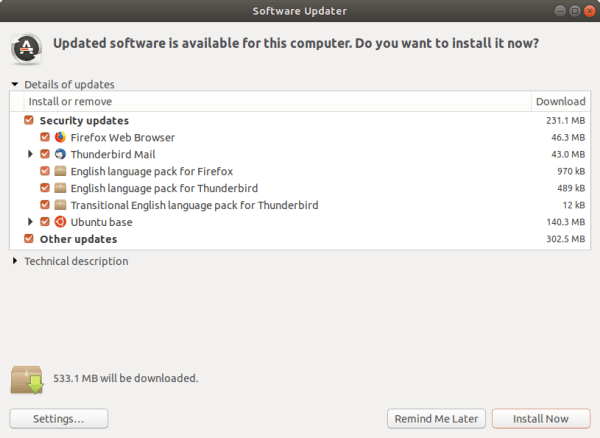
To make sure that you have the latest libraries and packages for your Linux OS, you can launch the Software Updater or launch the terminal from the menu or use the shortcut key Cntrl + Alt + T and enter the following command.
$ sudo apt update && sudo apt upgrade -y
2. Enable Partner Repositories
The next thing to do in Ubuntu 18 is to add additional repositories which might offer you more drivers and software updates, these are disabled in Ubuntu 18 by default. Most importantly, they are after all official, but are not shared publicly due to restrictive licenses.
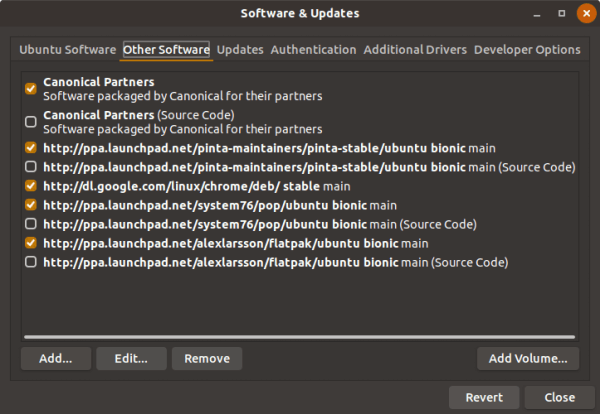
To enable additional repositories,
- Go to Software & Updates.
- Head over to the Other Software tab and select all the additional repositories other than Source Code Repositories.
3. Install Missing Graphic Drivers
Ubuntu Bionic Beaver or the other Linux distributions might not be the go-to OS for gamers. Nevertheless, installing the latest graphics drivers is one of the first things you should do after installing Ubuntu or any other Linux distributions.
You might already know that most drivers come pre-built in the Linux kernel. Due to the dependency on proprietary restricted drivers, graphics drivers like Nvidia and some printers are the only exceptions.
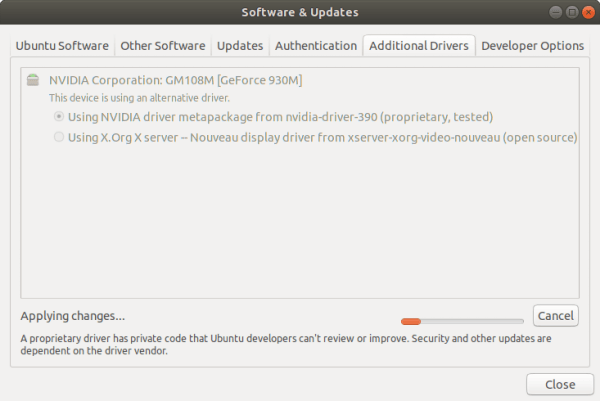
To update/install graphics drivers on the latest Ubuntu 18.04 LTS —
- Launch Software & Updates and hover over to the Additional Drivers tab.
- Under the Additional Drivers tab, you can choose whether to install the closed source proprietary software or open source x.org Xerver Driver.
- Installing the proprietary graphics driver is the recommended one in the list, and just as it reads, that would be the preferable one.
4. Installing Complete Multimedia Support
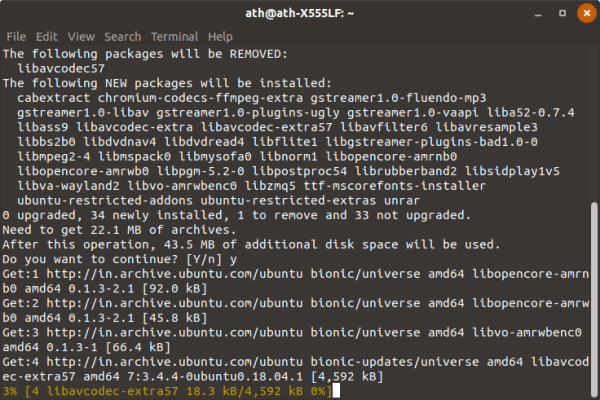
On the complete Ubuntu 18.04 LTS Bionic Beaver installation, you might remember the option to choose whether to Install third-party software for graphics and Wi-Fi hardware, Flash, MP3, and other media. Choosing this option would have already installed the necessary multimedia codecs and plugins. But the multimedia codecs are not installed in Ubuntu, nor is it available in the store.
If you have the synaptic package manager installed, you can search and install a package called ubuntu restricted packages, which is the term used for the codecs. Alternatively, you can use the terminal.

To do this, enter the command in terminal:
sudo apt install ubuntu-restricted-extras
5. Install Synaptic Package Manager
The Synaptic package manager is a very popular software manager for Ubuntu and Linux Mint. This great Linux software tool is used in almost all Debian distributions. For the reason being its ease of use and in-depth control, it goes well beyond the shortcomings of the Ubuntu Software Center and Linux Mint Software Manager.
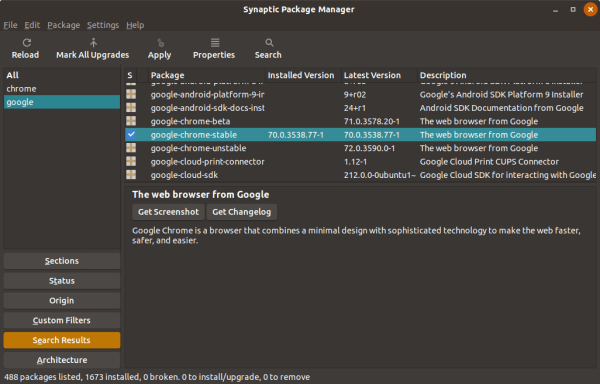
Synaptic Package Manager came pre-installed in Ubuntu Linux Distributions till the earlier release of Ubuntu 11 Oneiric Ocelot. To Install Synaptic package manager in Ubuntu, enter the following command in the terminal.
sudo apt-get install synaptic
Or you can use the Ubuntu software center instead. Furthermore, you should know that both Synaptic and Ubuntu Software center cannot be run at the same time as it would cause installation directory access conflicts.
Note: Keep in mind not to mess around with it if you don’t know what you are looking at. Removing essential packages can result in the unwanted behavior of the apps and the whole operating system.
6. Install Microsoft Fonts
Additionally, you can install Microsoft fonts in Linux. You can use the Ubuntu Software Center or the Synaptic package manager to do so.
- Launch the software manager by going to Menu > Administration > Software Manager.
- Type in Microsoft and select Ttf-mscorefonts-installer.
- Click Install.
7. Install Popular and Most useful Ubuntu software
Even though one might notice a few major software titles missing, almost all the popular software have Linux support. To help you get started, we will recommend a few free Ubuntu Linux Software here:
- Google Chrome ( Web Browser ).
- Audacious ( Audio Player ).
- VLC ( Video Player ).
- Skype ( Instant Messaging and Calling ).
- Libre Office ( Office Suites ).
- GIMP ( Photo Editor).
- ATOM ( Text Editor ).
- uGet ( Download Manager ).
- Transmission ( Torrent manager ).
- DropBox ( Cloud Storage ).
8. Install GNOME Shell Extensions
GNOME Shell Extensions are a great way for GNOME desktop users to customize their user experience by configuring interface components like launching animations, window management. Above all, the ability to personalize your Linux experience with icons, fonts, and skins without even having to install additional packages.
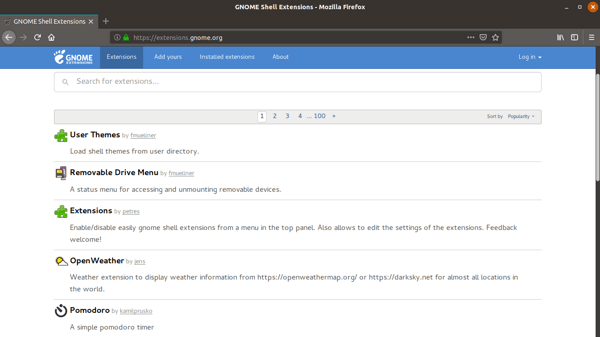
The GNOME Shell Extensions mainly work as extensions for your web browsers, such as chrome or firefox. Installation is done with just a flick of a button. A must-have feature to have after installing Ubuntu 18.
9. Backup Your System
Unlike Linux Mint, Ubuntu comes with the default Deja Dup backup tool for you to backup your important data. Note that this is not the Windows-type restore points that you may be aware of. Instead, this only stores your data files and folders on your system just in case something goes wrong.
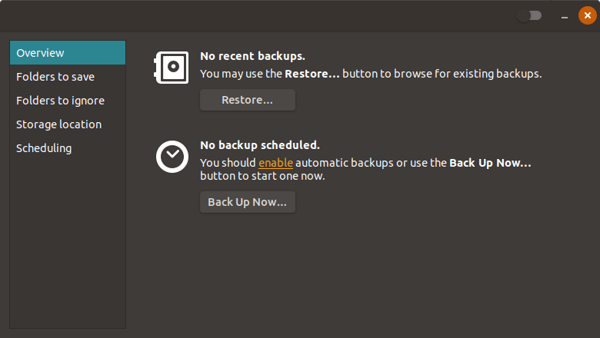
Though things have gotten quite better than the earlier times, Linux can cause some unexpected trouble. So, better prepare yourself.
10. Disable Startup Applications
Just like with Windows, Ubuntu 18.04 also has some applications which start up automatically. Additionally, to speed up the system startup and boot up after installing latest Ubuntu Bionic beaver, disabling some of the startup applications can help.
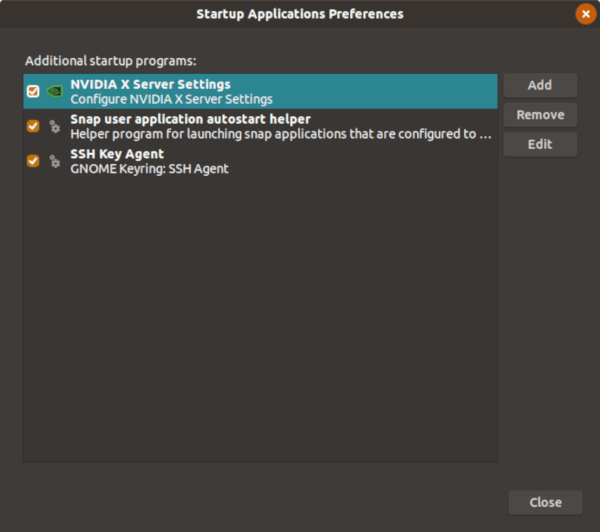
To do this, head over to —
- Startup Applications from the gnome app list.
- In the Startup Application Preferences, you can disable, add or remove the programs.
- Disabling prevents them from starting up automatically.
- Removing removes the entry from the list.
- Furthermore, you can use the Add function to add the program again to the list.
11. Optimize Ubuntu 18.04 Swap Usage (optional)
First of all, Swap memory is the backup memory partition utilized from the Hard Drive when the RAM memory runs out. As you should know, the hard drive is several times slower than the RAM. Therefore, as the swap usage increases, the overall system performance decreases. To mitigate this, we can instruct the PC to decrease its swap usage.
Note: Most probably, this tip would only be helpful for users with 2GB or less RAM. So, if you run a modern machine with 4GB or more, you need not to bother and can skip this step.
Now, the setting called Swappiness determines the swap usage by the system. To decrease this,
- First of all, check the current swappiness settings by entering the following in the terminal:
cat /proc/sys/vm/swappiness
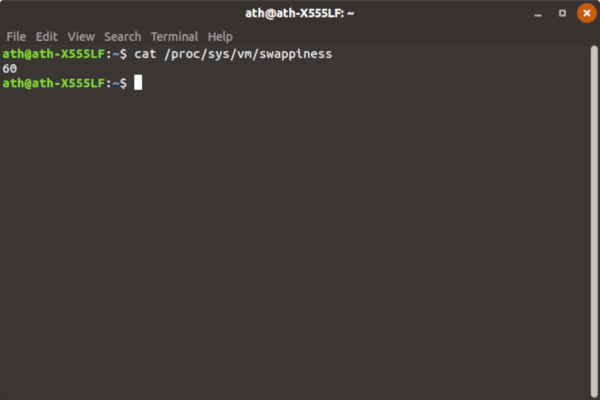
- By default, the value would be set at 60.
- Now, to change the swappiness settings, enter
xed admin:///etc/sysctl.conf - Enter your root password twice.
- Now scroll to the bottom of the page and change the value 60 to 10 as shown below:
# Decrease swap usage to a more reasonable levelvm.swappiness=10
- Restart and check the value again.
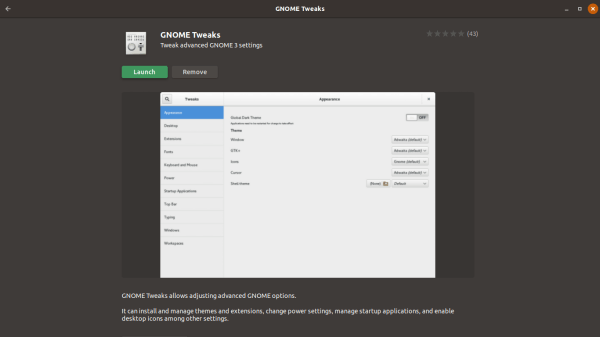
12. Install GNOME Tweak Tool
Highly regarded as the swiss-army knife tool for the users who like to tweak and customize their Ubuntu distribution to the fullest, the GNOME tweak tool allows you to gain access to the hidden settings and configurations for the GNOME desktop shell behavior.
13. Configure your Firewall Settings
The Linux Operating system is well known for its security and protection. Even more, improving security in every possible way possible is always recommended for this day and age. Moreover, enabling Linux Firewall would be a good place to start. Consequently, the Ubuntu Linux firewall is called Uncomplicated Firewall (ufw).
Enter the command sudo ufw status verbose to check whether ufw has been enabled or not.
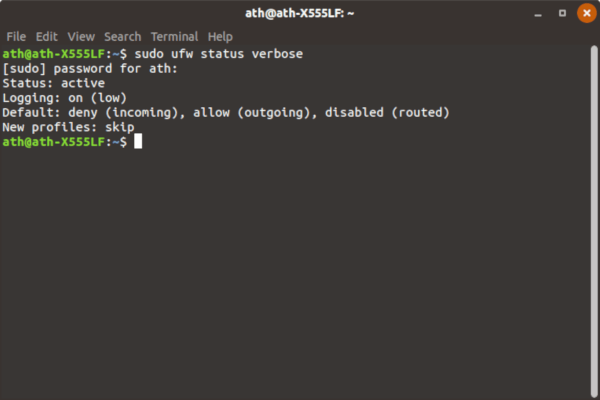
You can enable ufw via the command sudo ufw enable.
Additionally, the firewall can be accessed only via the terminal as a graphical interface for the Ubuntu firewall does not come preinstalled.
14. Ubuntu 18.04 LTS Bionic Beaver Data Collection
Canonical has added a quite controversial addition to the latest Ubuntu 18.04 Linux Distribution in the form of data collection. While some users are highly disturbed by this development, we urge you not to worry.

Especially when other operating systems are actively monitoring and using far more intrusive methods against user privacy, it is a rather harmless ask from the Canonical team to use bits of information for the better development of its software. Importantly, you can always choose to opt-out of this process by going to —
- System Settings > Privacy and changing Problem Reporting to Manual.
- Also, this option is shown at the start of the welcome screen after installing Ubuntu 18.04.

But before you do, have a look at the trivial information that Ubuntu wants you to share —
- Ubuntu Version and Desktop Environment that you are using.
- Specific OEM or device vendor (e.g., Dell, Lenovo, etc).
- Hardware configurations(CPU, RAM, GPU).
- Country.
- Amount of Time taken for the complete Installation to finish.
- Status of Auto Login Feature.
- Whether you choose to install third-party codecs.
- Whether you choose to download updates during install.
Note that Canonical ensures that the data is sent with encryption and security. Now, you can choose whether to actively support your best Linux Distribution development or opt-out of it completely.
15. Setup and Sync Your Online Cloud accounts
Online account and cloud syncing have been made better with the latest Ubuntu 18.04 LTS. The dedicated settings in Ubuntu bring to focus the intent from Canonical using GNOME to make the process of connecting and syncing with your cloud storage and online accounts.
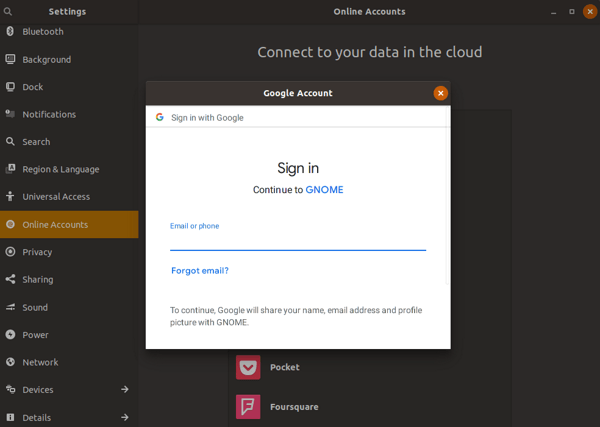
Therefore, with this feature, you would be able to access Google Drive seamlessly on your Linux System after installing Ubuntu 18.04 LTS. Even though the driver files are not stored locally on your device, you can have access to all your Gooogle Drive files albeit a little slow initially.
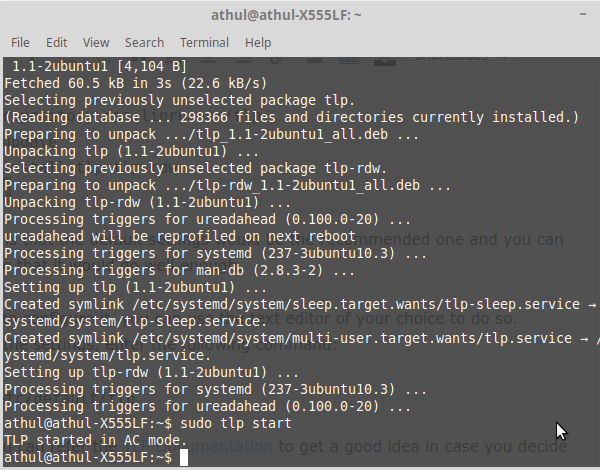
16. Improve Ubuntu 18.04 Battery by installing TLP for Linux
TLP is a great command line tool for improving the battery performance for your laptop after installing Ubuntu 18.04 LTS. This advanced power management tool comes with automated background tasks which can help you get the most out of your battery.
To install TLP in Ubuntu 18.04,
sudo add-apt-repository ppa:linrunner/tlp
sudo apt-get update
sudo apt-get install tlp tlp-rdw
sudo tlp start
Most noteworthy is that the default settings would be the recommended one and you can be safe to assume that it would do well enough.
Still, if you want to configure it, you can use the text editor of your choice to do so. Hence, to tweak the settings, enter the following command:
sudo gedit /etc/default/tlpConsequently, you can refer the TLP Documentation to get a good idea in case you decide to configure the settings.
Note: Always be cautious when trying out different settings as effects may vary depending on machine hardware.
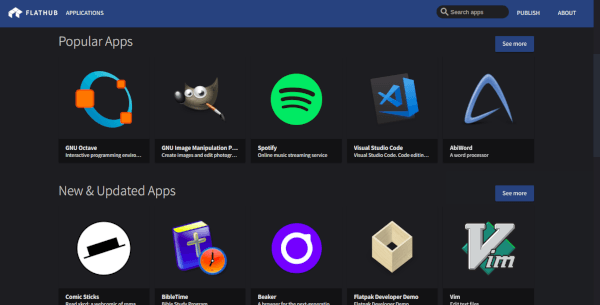
17. Snap or Flatpak
Snap and Flatpak are highly acclaimed as the future of software packaging for Linux and for good reason as well. Ubuntu 18.04 ships with Snap Software packaging by default. Hence, you would be able to get the Snap applications with the latest updates and features from the Snap store.
Likewise, you can also try out the similar package called Flatpak which is the preferred in the Linux Mint distribution. If you want to choose for yourself, you can try out both of them and compare them side by side.
To install Flatpak on Ubuntu, launch the terminal and enter the following command —
sudo add-apt-repository ppa:alexlarsson/flatpak
sudo apt update
sudo apt install flatpak
Additionally, you would have to add the plugin for the software package and the also the Flathub repository. To do this, run the following commands —
sudo apt install gnome-software-plugin-flatpakflatpak remote-add --if-not-exists flathub https://flathub.org/repo/flathub.flatpakrepo
Even more, both Snaps and Flatpak have their pros and cons. and we will let you be the judge on what suits you best as you begin to try them out.
18. Customize the Look and feel of Ubuntu 18.04 Bionic Beaver
Above all, the best thing about Linux is the power of customization. Funny enough, you might have already recognized the customized look in the screenshots posted here. That is the pretty popular theme called Pop. Along with that, there are tons of themes and icon packs available for you to try out. Installing them are pretty easy as well.
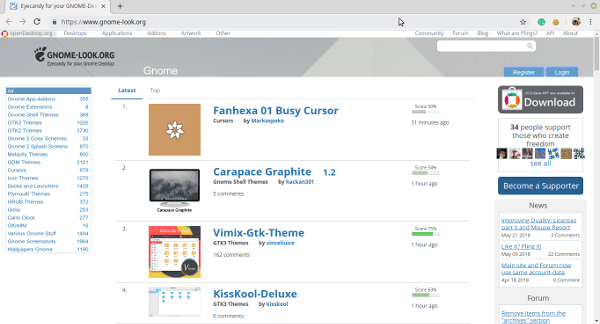
Head over to gnome-look.org to have a look at the best themes available. Finally, you can use the GNOME Tweak Tool for a better experience changing the theme of your Ubuntu system.
19. Play Games on Ubuntu
While everyone knows gaming isn’t one of Linux’s forte, times have certainly changed and currently; Linux holds many of the major titles in its arsenal. Even though not as great as the Windows platform, you can definitely have a good time playing several games in Ubuntu 18.04 Bionic Beaver.
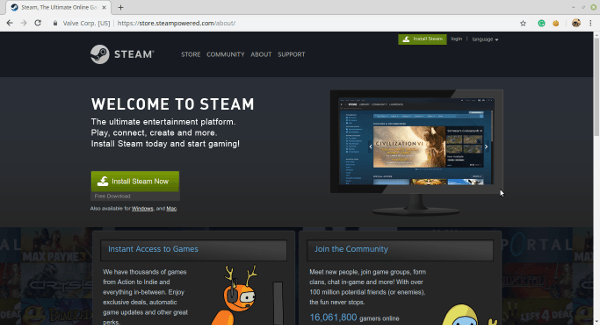
Especially taking the Steam client into consideration, you can play a wide range of major titles quite well. Gaming in Ubuntu is now much more optimized owing to the optimized graphics drivers and games optimized just especially for Linux.
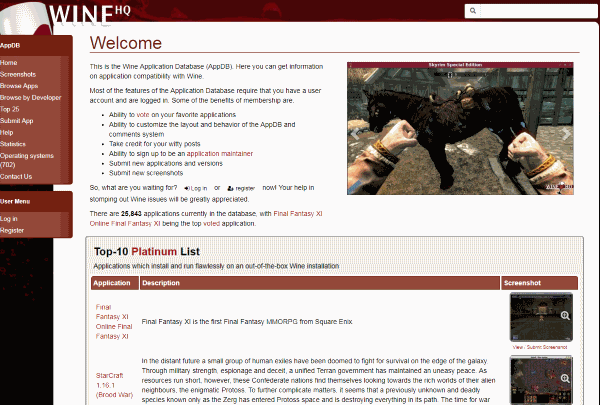
20. Install Wine and Play On Ubuntu Linux
The most notable software for Linux users coming from Windows is undoubtedly WINE. WINE stands for Wine Is Not An Emulator. Seems pretty self-explanatory, doesn’t it? Above all, Wine helps you efficiently run Windows applications on Ubuntu.
To install Wine, launch the terminal and enter the following command —
sudo apt-add-repository 'deb https://dl.winehq.org/wine-builds/ubuntu/ bionic main'
If you want to install WINE stable version:
sudo apt-get install --install-recommends winehq-stable
For WINE development version:
sudo apt-get install --install-recommends winehq-devel
Furthermore, if you want to install WINE staging version:
sudo apt-get install --install-recommends winehq-staging
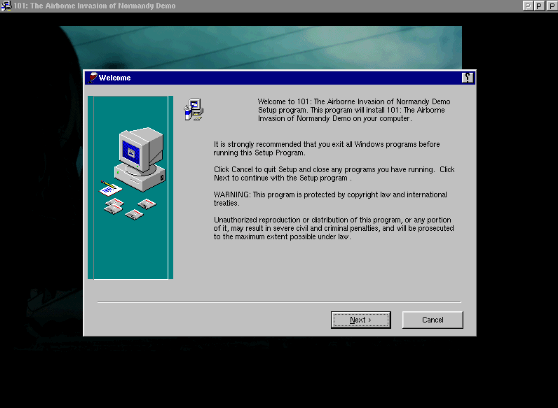
Additionally, you can install PlayOnLinux from the Software manager to enjoy playing some Windows games on Linux.
21. Turn On Night Light
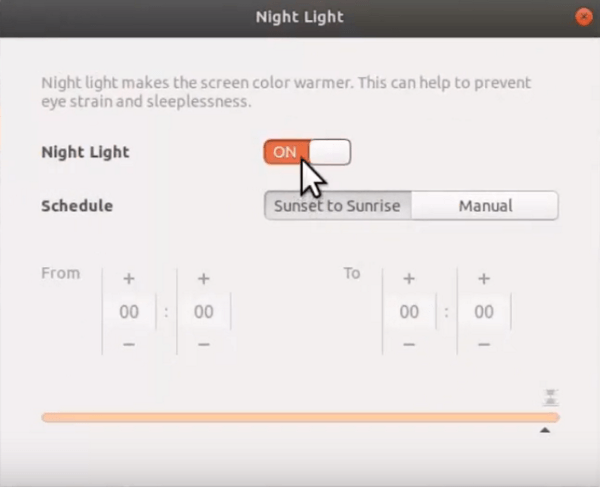
You might have heard of this term being included in the feature list of almost all smartphones and computer operating systems. After studies explaining how the brain perceives the blue light from the screens and renders bad effects to human sleeping habits, almost all the digital platforms have implemented the night light feature which filters the blue light enabling you to get some good sleep. As you may have already found that feature in smartphones and Windows, Night light feature in Ubuntu 18.04 brings a yellow tint to the screen during the night hours for the night owls among the users.
To enable Night light in the Ubuntu desktop, head over to —
- Settings > Devices > Screen Display >Night Light.
- Turn on the toggle switch for enabling Night light.
- Additionally, you can also schedule the time for when Night Light sets in.
And as simple as that, you have given your health some good service.
22. Useful Tweaks To Do After Installing Ubuntu 18.10/18.04 LTS
After using Ubuntu 18.04 for a short while, there are some settings that you would definitely want to implement for a better Linux Experience altogether. We can show you how.
Remove Amazon Launcher
Seems like the Amazon launcher still comes pre-installed in your Ubuntu 18.04 distribution and like many of the users, you might find that annoying and rather have it removed after installing Ubuntu 18.
Removing Amazon Launcher in the latest Ubuntu Linux is a rather simple task. To do this, just fire up the terminal and enter the command —
$ sudo apt purge ubuntu-web-launchers
Amplify Volume Output
Just like in Linux Mint, you can also easily amplify the volume output to 150% in Ubuntu 18 with a simple setting.
- Firstly, access the sound preferences via right clicking on the sound menu in the panel or in General settings.
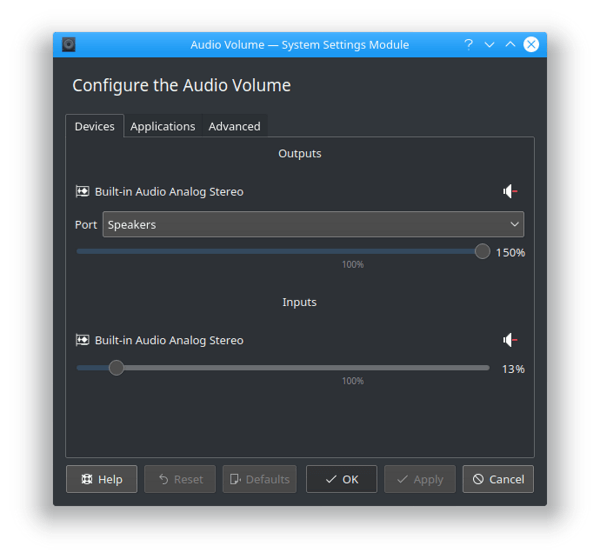
- Now, go to the Advanced Tab, you can use the slider under Amplification to set the maximum volume output.
Display Battery Percentage
Besides, if you are one of those people who would like to see the battery percentage right on top of the Ubuntu 18.04 screen at all times, you can use this method.
- Access the GNOME tweak tool from the menu.
- Now, navigate to the top bar, change the setting for battery percentage to Show percentage.
Automatically Turn on NumLock
Another tweak to try after installing Ubuntu 18.04 Bionic Beaver that most would find helpful is to automatically turn on NumLock when the operating system boots up. Enabling This feature after installing Ubuntu 18.04 is especially useful for laptop users who are using numerical passwords.
23. Clean Up your Ubuntu Linux System
Finally, we should take note to clean the system of any temporary leftover files and junk.
Launch the Terminal and enter the following commands:
To remove the packages that failed to install completely,
$ sudo apt-get autoclean
Additionally, to remove the apt-cache,
$ sudo apt-get clean
Finally, to remove the unwanted software dependencies,
$ sudo apt-get autoremove
Important Things To Do After Installing Ubuntu 18.04
As we see, setting up your Linux machine after installing the latest Ubuntu 18.04 LTS Bionic Beaver distribution is equally important and simple. Furthermore, if you decide to try out the ever-growing popular distro Linux Mint 19, you can check out our article to try out the important things to do after installing Linux Mint 19.
If you want to know more or you need help with any other Linux distributions after installing it in your system, feel free to use the comment section below.