 Unlike Windows, Linux does not mounts file systems automatically on computer startup. You have to mount each partition manually after boot. This can be annoying if some applications have to access contents from some unmounted partitions on startup, like a media player. If your music library resides on any unmounted partition, each time you open up your media player, the contents won’t appear unless you mount that partition. In that case, you might want to auto mount that partition.
Here, I am going to discuss about editing the fstab file directly. You won’t need a “how to” on doing it graphically.
Let’s get started
First, create a backup of your original fstab file. It can be removed later if file systems mount properly. The fstab file is present in /etc/ directory. To do this, open a terminal window and type:
sudo cp /etc/fstab /etc/fstab.original
The fstab file stores entries in the following format:
<UUID or Label> <Mount point> <File system type> <Mount options> <fs_freq> <fs_passno>
The fifth and sixth field are used by dump and fsck utility respectively. These determine which file system needs to be dumped, and the order of mounting of file systems. These are given a 0 value generally.
It is also recommended that you should use UUID to identify partition rather than label, as labels can mismatch.
Finding UUID of partition:
To get the UUID of desired partition, type:
sudo blkid
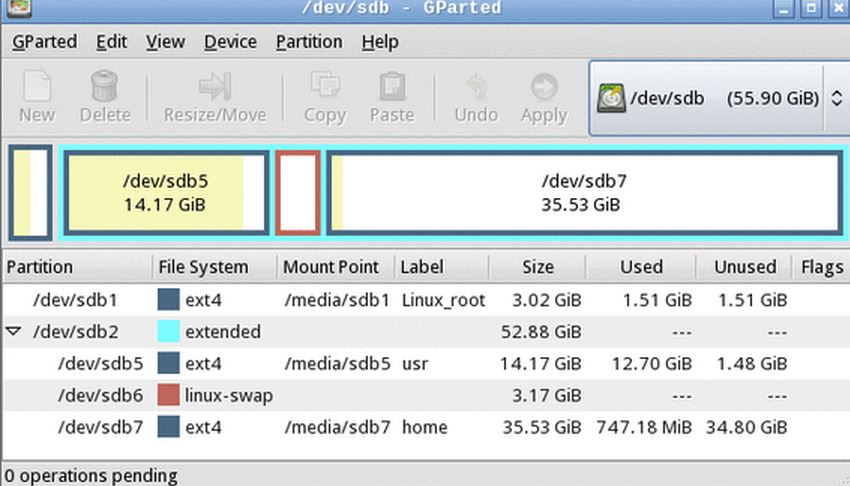
This would show a list of partitions with their labels and UUID. You can identify a partition by its Label. Or use lsblk to identify the partition by its size. Copy the UUID of desired partition.
Creating an entry in fstab:
Open the file /etc/fstab in a text editor with root privileges. At the end of file, append a line representing the partition’s details.
The mount point is generally a folder in /mnt/ directory, like /mnt/windows. You need to create a folder there prior to mounting. The type of partition can be determined from the blkid command given above. A default should suffice in the mount option field. You can provide other mount options like uid, gid, umask etc in a comma separated list after default. After that, specify the <fs_freq> and <fs_passno> as 0 (or 1,2.., if you are sure to change dump or mount order options). You can use previous entries in the fstab file as a referance, or the image below.

Note: After updating the fstab file, unmount manually mounted partitions and type sudo mount -a in the terminal. If you get unwanted results, like wrong permissions, you can update the file accordingly. So next time you boot up the system you’ll get the desired results.
DO NOT MODIFY PREVIOUS ENTRIES IN THE FSTAB FILE. It may lead to an unbootable system. Then you’ll have to replace the updated file with the fstab.original file created in first step.
A note for windows users
If you’re dual booting with Microsoft Windows 8 (or above), you will have to disable fast startup first, otherwise your Linux might display an error on startup. There is an option in the control panel > power options, to disable fast startup.
Try this out and if you find some difficulty, comment down your queries.
Recommended for you: Linux Windows Dual Boot and More: Multi-booting Up to Five OS