T-Pot is based on Ubuntu Server 16.10 LTS. The honeypot daemons as well as other support components being used have been paravirtualized using docker. This allowed developers to run multiple honeypot daemons on the same network interface without problems and make the entire system very low maintenance.
The encapsulation of the honeypot daemons in docker provides a good isolation of the runtime environments and easy update mechanisms.
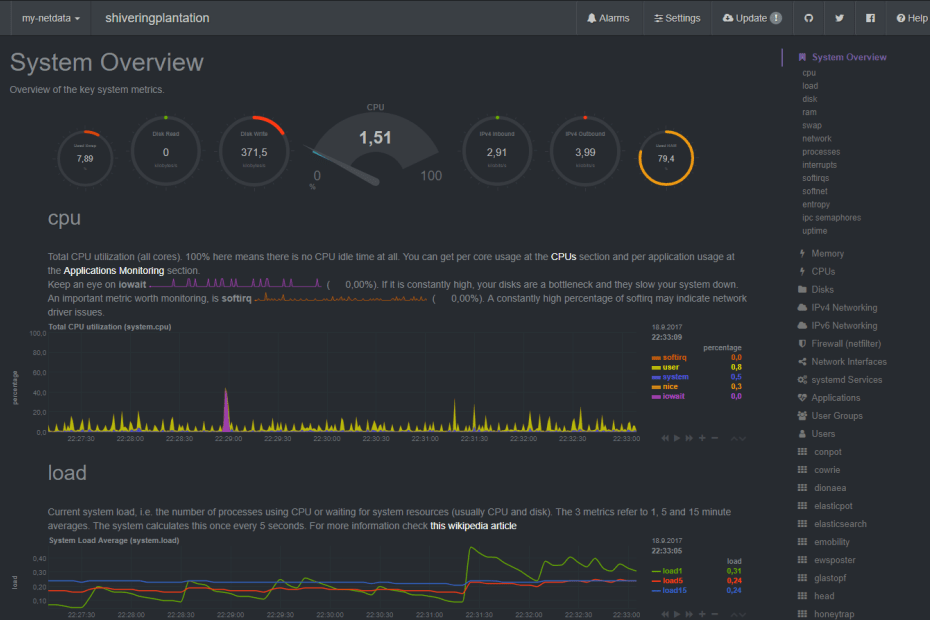
In T-Pot developers combined the dockerized honeypots ( conpot, cowrie, dionaea, elasticpot, emobility, glastopf and honeytrap ) with suricata a Network Security Monitoring engine and the ELK stack to beautifully visualize all the events captured by T-Pot. Events will be correlated by specially developed data submission tool ewsposter which also supports Honeynet project hpfeeds honeypot data sharing.

All data in docker is volatile. Once docker container crashes, all data produced within its environment is gone and a fresh instance is restarted. Hence, for some data that needs to be persistent, like config files etc., a persistent data storage is mounted to /data/ on the host in order to make it available and persistent across container or system restarts.
Basically, what happens when the system is booted up is the following:
- start host system
- start all docker containers (honeypots, IDS, elk, ewsposter)
- ewsposter periodically checks the honeypot containers for new attacks and submits data to our community backend
The individual docker configurations etc. we used can be found here:
System Requirements
Depending on your installation type, whether you install on real hardware or in a virtual machine, make sure your designated T-Pot system meets the following requirements:
T-Pot Installation (Cowrie, Dionaea, ElasticPot, Glastopf, Honeytrap, ELK, Suricata+P0f)
When installing the T-Pot ISO image, make sure the target system (physical/virtual) meets the following minimum requirements:
- 4 GB RAM (6-8 GB recommended)
- 64 GB disk (128 GB SSD recommended)
- Network via DHCP
- A working internet connection
Sensor Installation (Cowrie, Dionaea, ElasticPot, Glastopf, Honeytrap)
This installation type is currently only available via ISO Creator. When installing the T-Pot ISO image, make sure the target system (physical/virtual) meets the following minimum requirements:
- 3 GB RAM (4-6 GB recommended)
- 64 GB disk (64 GB SSD recommended)
- Network via DHCP
- A working internet connection
Industrial Installation (ConPot, eMobility, ELK, Suricata+P0f)
This installation type is currently only available via ISO Creator and remains experimental. When installing the T-Pot ISO image, make sure the target system (physical/virtual) meets the following minimum requirements:
- 4 GB RAM (8 GB recommended)
- 64 GB disk (128 GB SSD recommended)
- Network via DHCP
- A working internet connection
Everything Installation (Everything)
This installation type is currently only available via ISO Creator. When installing the T-Pot ISO image, make sure the target system (physical/virtual) meets the following minimum requirements:
- 8 GB RAM
- 128 GB disk or larger (128 GB SSD or larger recommended)
- Network via DHCP
- A working internet connection
Installation
The installation of T-Pot is straight forward. Please be advised that you should have an internet connection up and running as all all the docker images for the chosen installation type need to be pulled from docker hub.
Prebuilt ISO Image
Installation ISO image for download (~600MB) was provided, which is created using the same tool you can use yourself in order to create your own image. It will basically just save you some time downloading components and creating the ISO image. You can download the prebuilt installation image here and jump to the installation section. The ISO image is hosted by our friends from Strato / Cronon.
shasum tpot.iso
778066c28b071f60696781148fbd2c4179276a47 tpot.iso
Create your own ISO Image
For transparency reasons and to give you the ability to customize your install, we provide you the ISO Creator that enables you to create your own ISO installation image.
Requirements to create the ISO image:
- Ubuntu 14.04.4 or newer as host system (others may work, but remain untested)
- 4GB of free memory
- 32GB of free storage
- A working internet connection
How to create the ISO image:
- Clone the repository and enter it.
git clone https://github.com/dtag-dev-sec/tpotce.git cd tpotce - Invoke the script that builds the ISO image. The script will download and install dependencies necessary to build the image on the invoking machine. It will further download the ubuntu base image (~600MB) which T-Pot is based on.
sudo ./makeiso.sh
After a successful build, you will find the ISO image tpot.iso in your directory.
Running in VM
You may want to run T-Pot in a virtualized environment. The virtual system configuration depends on your virtualization provider. System was successfully tested with VirtualBox and VMWare with just little modifications to the default machine configurations.
- It is important to make sure you meet the system requirements and assign a virtual harddisk >=64 GB, >=4 GB RAM and bridged networking to T-Pot.
- You need to enable promiscuous mode for the network interface for suricata to work properly. Make sure you enable it during configuration.
- If you want to use a wifi card as primary NIC for T-Pot, please remind that not all network interface drivers support all wireless cards. E.g. in VirtualBox, you then have to choose the “MT SERVER” model of the NIC.
- Lastly, mount the
tpot.isoISO to the VM and continue with the installation.
Running on Hardware
If you decide to run T-Pot on dedicated hardware, just follow these steps:
- Burn a CD from the ISO image or make a bootable USB stick using the image.
Whereas most CD burning tools allow you to burn from ISO images, the procedure to create a bootable USB stick from an ISO image depends on your system. There are various Windows GUI tools available, e.g. this tip might help you.
On Linux or MacOS you can use the tool dd or create the USB stick with T-Pot’s ISO Creator. - Boot from the USB stick and install.

A Multi-Honeypot Platform: The First Run
The installation requires very little interaction, only some locale and keyboard settings have to be answered. Everything else will be configured automatically. The system will reboot two times. Make sure it can access the internet as it needs to download the updates and the dockerized honeypot components. Depending on your network connection and the chosen installation type, the installation may take some time. During our tests (50Mbit down, 10Mbit up), the installation was usually finished within 30 minutes.
Once the installation is finished, the system will automatically reboot and you will be presented with the T-Pot login screen. The user credentials for the first login are:
- user: tsec
- pass: tsec
You will need to set a new password after first login.
All honeypot services are started automatically.
System Placement
Make sure your system is reachable through the internet. Otherwise it will not capture any attacks – other than the ones from your hostile internal network :). We recommend you put it in an unfiltered zone, where all TCP and UDP traffic is forwarded to T-Pot’s network interface.
If you are behind a NAT gateway (e.g. home router), here is a list of ports that you should forward to T-Pot.
| Honeypot | Transport | Forwarded ports |
|---|---|---|
| conpot | TCP | 81, 102, 502 |
| conpot | UDP | 161 |
| cowrie | TCP | 22 |
| dionaea | TCP | 21, 42, 135, 443, 445, 1433, 3306, 5060, 5061, 8081 |
| dionaea | UDP | 69, 5060 |
| elasticpot | TCP | 9200 |
| emobility | TCP | 8080 |
| glastopf | TCP | 80 |
| honeytrap | TCP | 25, 110, 139, 3389, 4444, 4899, 5900, 21000 |
Basically, you can forward as many TCP ports as you want, as honeytrap dynamically binds any TCP port that is not covered by other honeypot daemons. In case you need external SSH access, forward TCP port 64295 to T-Pot. T-Pot requires outgoing http and https connections for updates (ubuntu, docker) and attack submission (ewsposter, hpfeeds).


