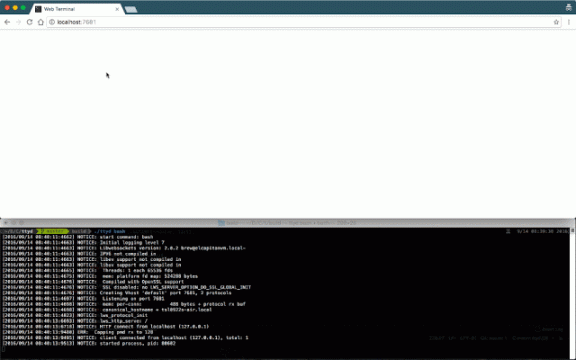
ttyd is a simple command-line tool for sharing terminal over the web, inspired by GoTTY.
Features
- Built on top of Libwebsockets with C for speed
- Fully-featured terminal based on Xterm.js with CJK and IME support
- Graphical ZMODEM integration with lrzsz support
- SSL support based on OpenSSL
- Run any custom command with options
- Basic authentication support and many other custom options
- Cross platform: macOS, Linux, FreeBSD/OpenBSD, OpenWrt/LEDE, Windows
Installation
Install on macOS
Install with homebrew:
brew install ttyd
Install on Linux
- Binary version download from the releases page.
- Build from source (debian/ubuntu):
sudo apt-get install cmake g++ pkg-config git vim-common libwebsockets-dev libjson-c-dev libssl-dev
git clone https://github.com/tsl0922/ttyd.git
cd ttyd && mkdir build && cd build
cmake ..
make && make install
You may also need to compile/install libwebsockets from source if the libwebsockets-dev package is outdated.
Install on Gentoo:
clone the repo at https://bitbucket.org/mgpagano/ttyd/src/master/ and follow the directions here for creating a local repository.
Install on Windows
ttyd can be built with MSYS2 on windows, The build instructions is here.
NOTE: Native windows console programs may not work correctly due to pty incompatibility issues. As a workaround, you can use winpty as a wrapper to invoke the windows program, eg: ttyd winpty cmd.
Install on OpenWrt/LEDE
LEDE 17.01.0 and later:
opkg install ttyd
You may want to compile it manually.
Usage
Command-line Options
ttyd is a tool for sharing terminal over the web
USAGE:
ttyd [options] <command> [<arguments…>]
VERSION:
1.4.4
OPTIONS:
-p, –port Port to listen (default: 7681, use `0` for random port)
-i, –interface Network interface to bind (eg: eth0), or UNIX domain socket path (eg: /var/run/ttyd.sock)
-c, –credential Credential for Basic Authentication (format: username:password)
-u, –uid User id to run with
-g, –gid Group id to run with
-s, –signal Signal to send to the command when exit it (default: 1, SIGHUP)
-r, –reconnect Time to reconnect for the client in seconds (default: 10)
-a, –url-arg Allow client to send command line arguments in URL (eg: http://localhost:7681?arg=foo&arg=bar)
-R, –readonly Do not allow clients to write to the TTY
-t, –client-option Send option to client (format: key=value), repeat to add more options
-T, –terminal-type Terminal type to report, default: xterm-256color
-O, –check-origin Do not allow websocket connection from different origin
-m, –max-clients Maximum clients to support (default: 0, no limit)
-B, –browser Open terminal with the default system browser
-I, –index Custom index.html path
-6, –ipv6 Enable IPv6 support
-S, –ssl Enable SSL
-C, –ssl-cert SSL certificate file path
-K, –ssl-key SSL key file path
-A, –ssl-ca SSL CA file path for client certificate verification
-d, –debug Set log level (default: 7)
-v, –version Print the version and exit
-h, –help Print this text and exit
Visit https://github.com/tsl0922/ttyd to get more information and report bugs.
Example Usage
ttyd starts web server at port 7681 by default, you can use the -p option to change it, the command will be started with arguments as options. For example, run:
ttyd -p 8080 bash -x
Then open http://localhost:8080 with a browser, you will get a bash shell with debug mode enabled.
More Examples:
- If you want to login with your system accounts on the web browser, run ttyd login.
- You can even run a none shell command like vim, try: ttyd vim, the web browser will show you a vim editor.
- Sharing single process with multiple clients: ttyd tmux new -A -s ttyd vim, run tmux new -A -s ttyd to connect to the tmux session from terminal.
Browser Support
Modern browsers, See Browser Support.
SSL how-to
Generate SSL CA and self signed server/client certificates:
# CA certificate (FQDN must be different from server/client)
openssl genrsa -out ca.key 2048
openssl req -new -x509 -days 365 -key ca.key -subj “/C=CN/ST=GD/L=SZ/O=Acme, Inc./CN=Acme Root CA” -out ca.crt
# server certificate (for multiple domains, change subjectAltName to: DNS:example.com,DNS:www.example.com)
openssl req -newkey rsa:2048 -nodes -keyout server.key -subj “/C=CN/ST=GD/L=SZ/O=Acme, Inc./CN=localhost” -out server.csr
openssl x509 -req -extfile <(printf “subjectAltName=DNS:localhost”) -days 365 -in server.csr -CA ca.crt -CAkey ca.key -CAcreateserial -out server.crt
# client certificate (the p12/pem format may be useful for some clients)
openssl req -newkey rsa:2048 -nodes -keyout client.key -subj “/C=CN/ST=GD/L=SZ/O=Acme, Inc./CN=client” -out client.csr
openssl x509 -req -days 365 -in client.csr -CA ca.crt -CAkey ca.key -CAcreateserial -out client.crt
openssl pkcs12 -export -clcerts -in client.crt -inkey client.key -out client.p12
openssl pkcs12 -in client.p12 -out client.pem -clcerts
Then start ttyd:
ttyd –ssl –ssl-cert server.crt –ssl-key server.key –ssl-ca ca.crt bash
You may want to test the client certificate verification with curl:
curl –insecure –cert client.p12[:password] -v https://localhost:7681
If you don’t want to enable client certificate verification, remove the –ssl-ca option.
Docker and ttyd
Docker containers are jailed environments which are more secure, this is useful for protecting the host system, you may use ttyd with docker like this:
- Sharing single docker container with multiple clients: docker run -it –rm -p 7681:7681 tsl0922/ttyd.
- Creating new docker container for each client: ttyd docker run -it –rm ubuntu.