Short Bytes: Using command prompt in Windows, you can easily hide/unhide any drive just like we hide folders and files. Windows labels each volume with a letter in its internal system and if we manipulate the letters assigned to a data volume, we can easily hide any drive on Windows.
But this method is not new and people have become aware of this trick as well and they can now see the hidden folder easily under the menu option provided by the Windows.
In this case, how about hiding an entire drive in Windows which contains your personal data? Sounds cool? Yes, using some simple and handy commands, you can easily hide any drive in Windows using Command prompt. So, let’s see how it works:
Hide any drive in Windows using Command Prompt:
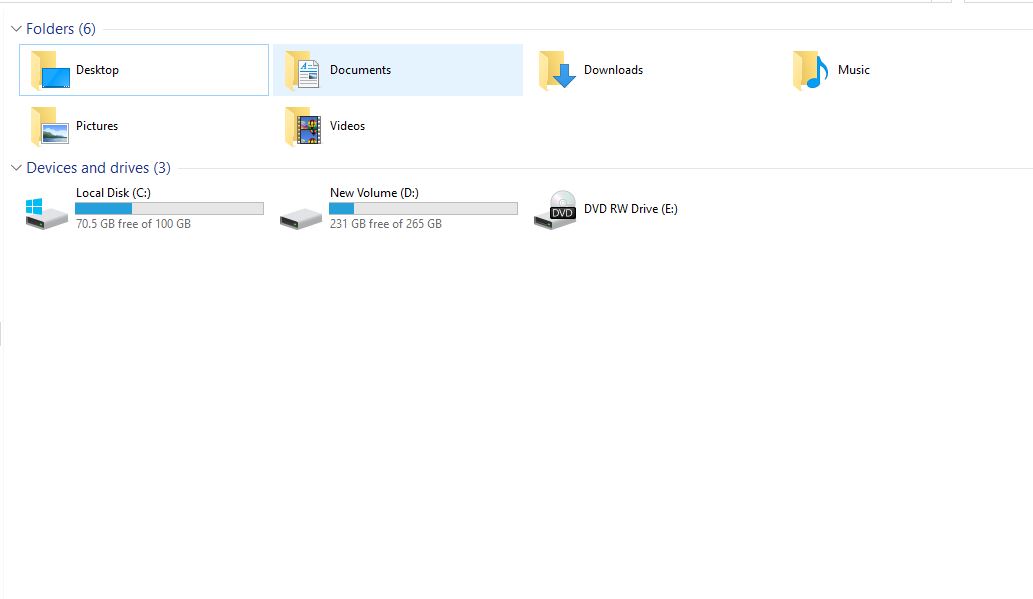
To hide any drive in Windows using CMD, follow the steps mentioned ahead. Here’s a snapshot of all of the drives on my Windows PC:
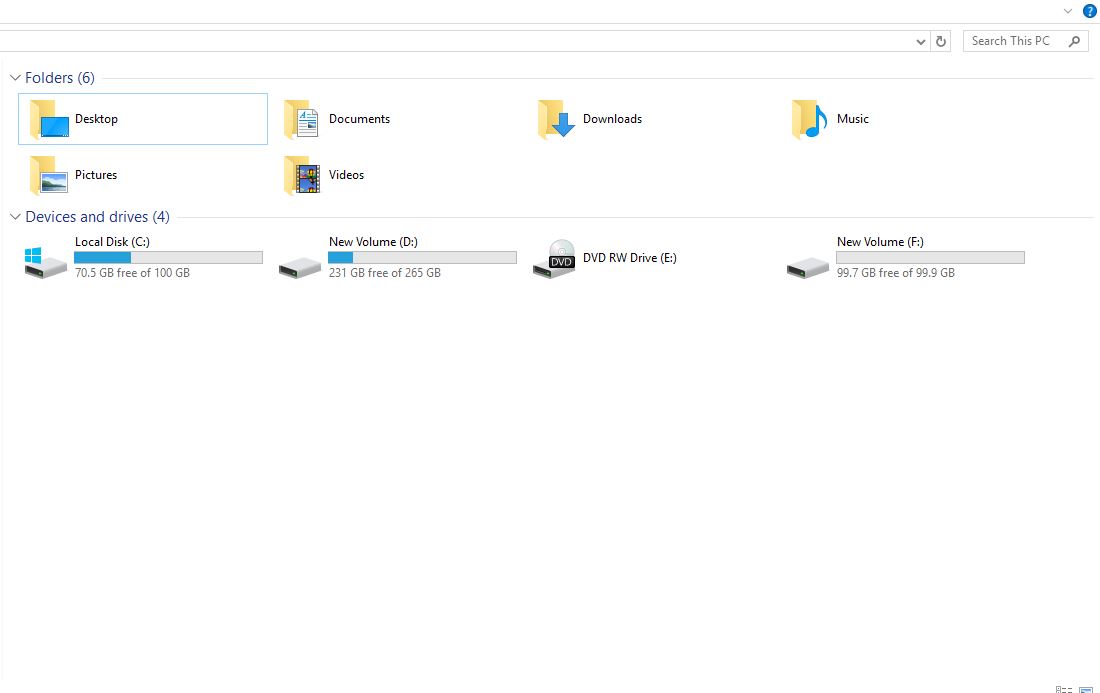

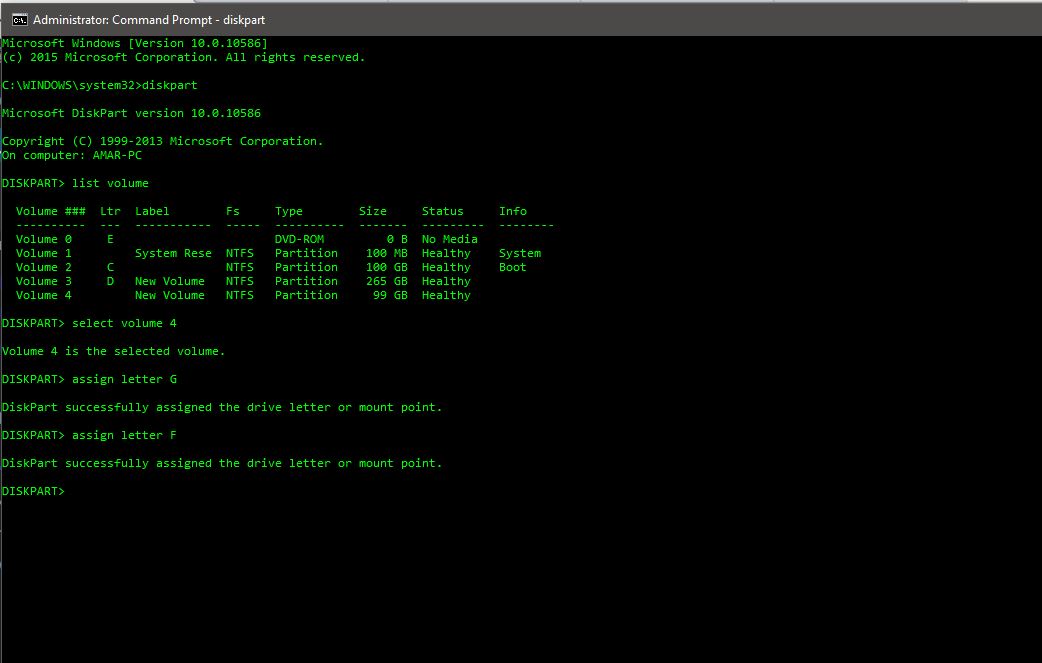
For this tutorial purpose and to be on the safer side, I have just created a new volume named ‘F’ and I am going to execute the following commands and see if it’s going to work out.
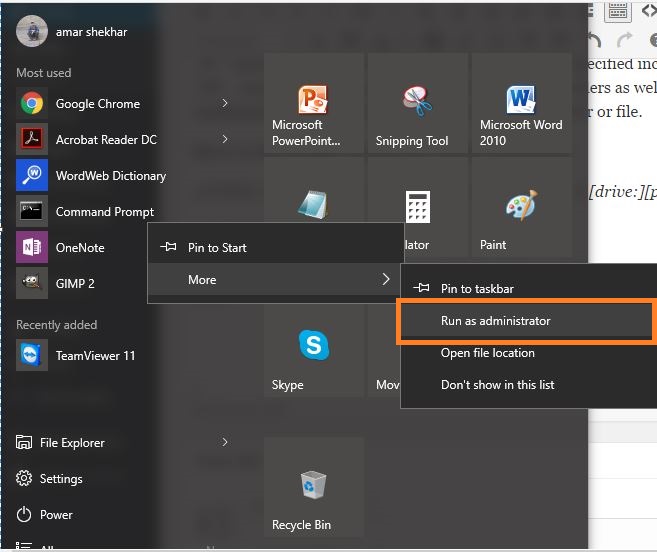
- Open command prompt with ‘Run as administrator’ permissions.

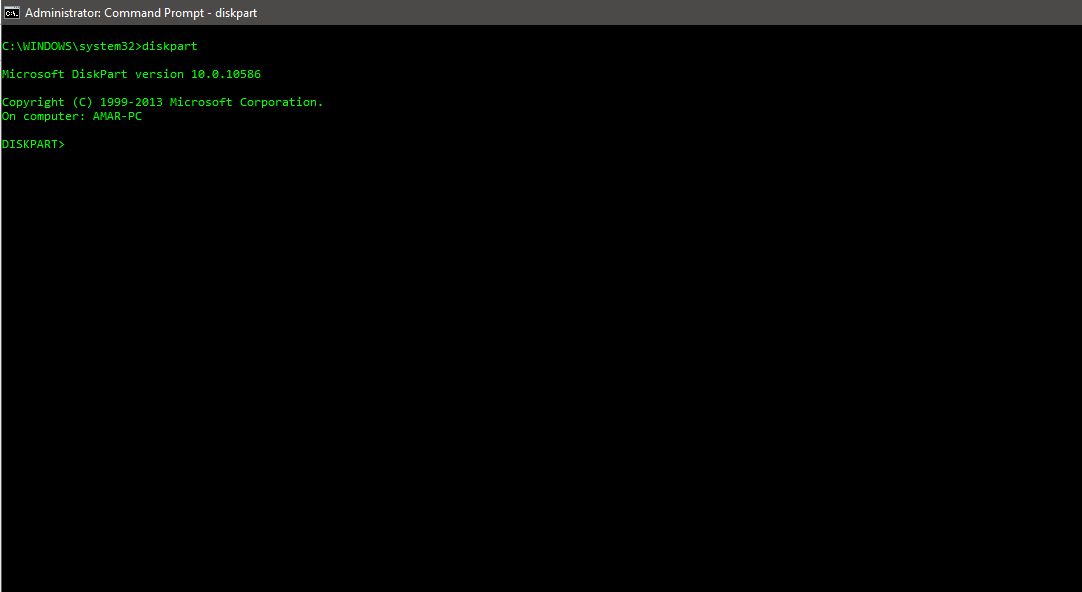
- Type the command “Diskpart” in your command prompt. If any popup appears then, just press yes and it will open up a new window in your command prompt which will look something like this:

- Then type list volume and you can see that all the volumes are listed down after your press enter.
Looking closely, you can see that all the volumes have a volume number like 1, 2, 3, 4 etc. and each volume is assigned a letter such as C, D, E, F etc.
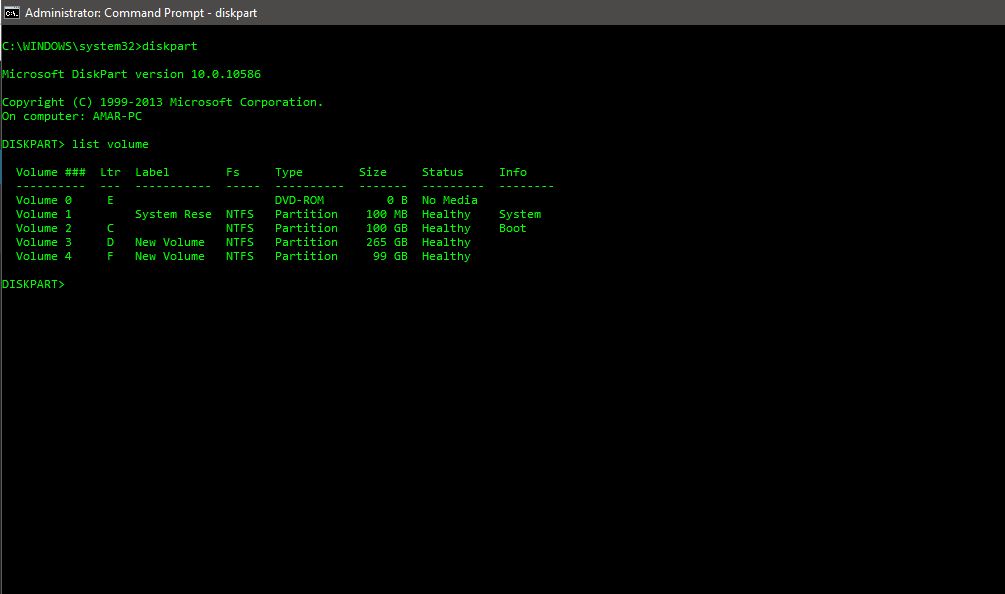

- Now remember the volume number you want to hide. In my case, I want to hide my newly created volume assigned the letter F and it has volume number 4.
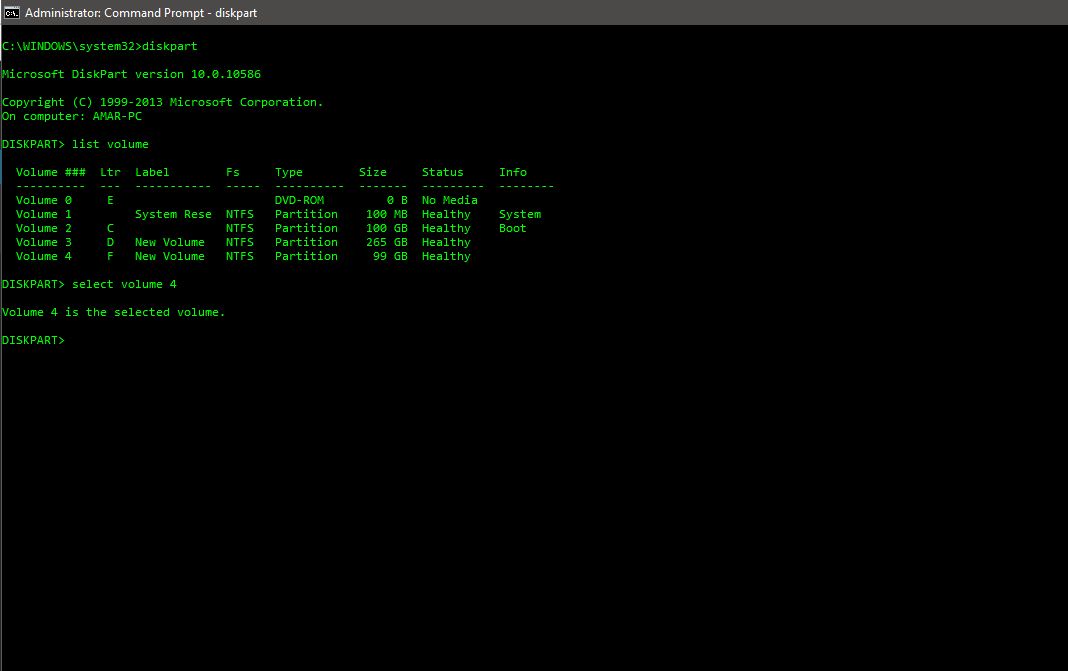
- Now type select volume 4 and press enter. (Your volume number could be different than mine in this case). Once you’ve selected a volume, you will also get a message.

In the next step, we are going to hide the volume 4 or the volume you have selected in your case. In my case, for volume 4, the letter is ‘F’. In your case, the letter could be C, D, E, F etc.
So, recognize the associated letter with the drive and follow the last steps below:
- Type remove letter F in our command prompt.
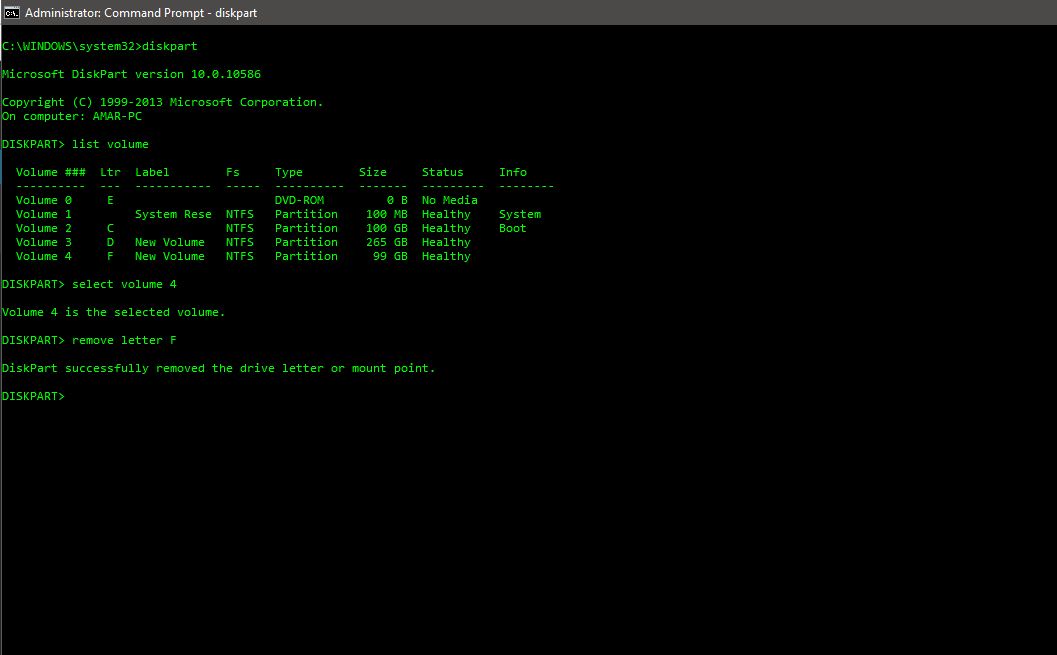

- And it’s done. The selected drive has been hidden successfully. Let me go and check it out. Oh, here is a screenshot of the same.

So, it works. Now, let’s unhide the same drive.
To unhide any drive in Windows using command prompt, follow the steps below:
- Close your command prompt and follow the first four steps shown above (until select volume 4).
- Now, type assign letter F (your drive letter in this case) and then press enter. Now your hidden drive is up and working in no time.

With these commands executed, you can simply hide any drive in Windows using Command prompt to protect your personal and sensitive data.
If you face any problem in executing these simple commands to hide any drive in Windows using Command prompt, you can let us know in the comments below.
Also Read: How To Remove Virus From USB Or Any Drive On Windows 10 Using CMD