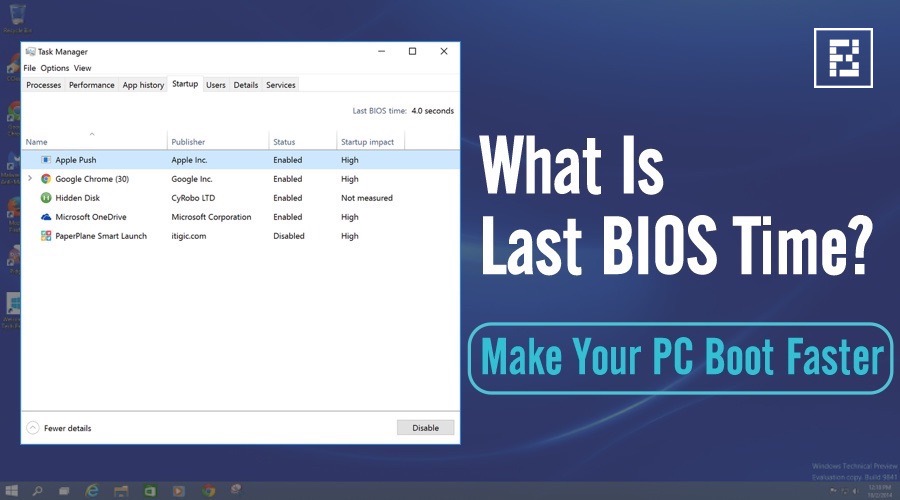

Short Bytes: Very often curious Windows users search the phrase “What is Last BIOS Time in my Task Manager?” Well, it’s the time taken by your computer’s UEFI firmware to initialize your hardware before the Windows OS starts booting. By paying a close attention to your PC’s boot-up process, one can tweak some UEFI settings to decrease the Last BIOS Time and make the Windows PC boot faster.
With every new version of Windows operating system, Microsoft has improved the OS boot time. Its latest offerings Windows 10 boots very fast and people hardly complain about this issue. Still, to answer the grievances of some users, in the past, we have shared a dedicated article on Windows 10 boot time fixes.
In this article, we are going to tell you about something new and interesting.
What is Last BIOS Time in Task Manager?
When you switch on your computer, the Last BIOS Time of a Windows PC is the time your computer’s BIOS (more precisely, UEFI firmware) takes to initialize your hardware before it starts booting Windows OS.
When your computer boots up, it loads the UEFI firmware from an EFI System partition that’s located on the motherboard. The UEFI firmware is basically a program that contains the information about various hardware settings. It initializes your PC’s hardware and transfers the control to your operating system’s bootloader.
So, Last BIOS Time is basically how long your PC takes to boot before it starts booting Windows operating system.
How to check your Last BIOS Time?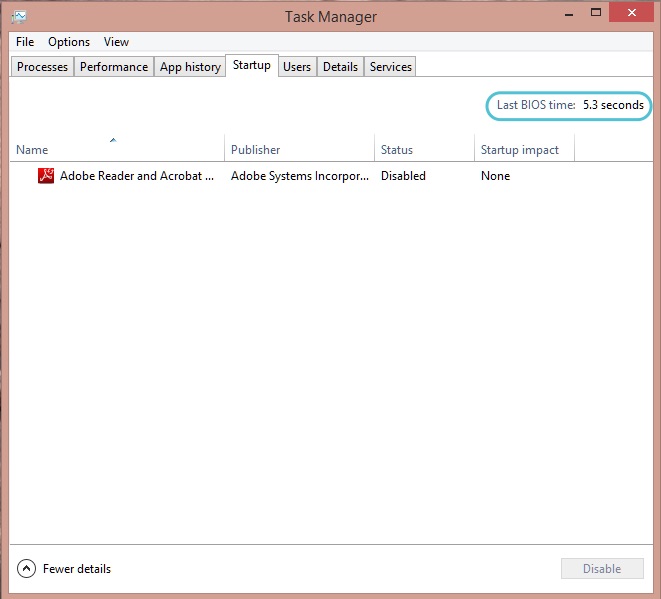

Checking your Windows PC’s Last BIOS Time is very simple. To view it, you need to open your Task Manager. To this, simply right-click on the taskbar and select Task Manager. Alternatively, you can press Ctrl+Shift+Escape to open the Task Manager.
Now, you need to click the Startup tab. If your Task Manager window isn’t displaying tabs like Process, Performance, Startup etc., you need to click on the More Details at the bottom of Task Manager window.
Note:
Please note that not every computer will display this information. This feature was first introduced in Windows 8. So, Windows 7 and older PCs won’t be seeing the Last BIOS Time.
As per the available information on the internet, Last BIOS Time is only displayed if your computer uses a computer with UEFI firmware. If you are running Windows in a virtual machine, there are chances that you won’t be seeing it. Another thing–instead of the legacy BIOS compatibility mode, your PC must be using UEFI boot mode.
How to decrease Last BIOS Time and make your PC boot faster?
The UEFI firmware takes some time to initialize your computer hardware before your operating system boots up. There are some tweaks that you can make to lower this time and make your Windows PC boot faster.
If your PC’s Last BIOS Time is some number less than 10 seconds, it’s fine. Very often we see the Last BIOS Time of around 3 seconds. However, if you see the Last BIOS Time over 25-30 seconds, it means that there’s something wrong in your UEFI settings.
It’s advisable to pay attention to the boot-up process as it’ll give you more information regarding what’s right and what’s wrong. You also need to read your computer/motherboard manual for more information about the settings.
Here are some tips to decrease your Last BIOS Time.
- You can stop your PC from showing a logo during bootup. However, it may only save 0.2-0.3 seconds.
- Adjusting the boot order is another method to decrease the Last BIOS Time. If your PC checks for 4-5 seconds to boot from a network device, you need to disable network boot from the UEFI firmware settings.
- If your Windows PC performs a memory test–or some other test–at each boot, you can disable it to decrease your Last BIOS Time.
- You also have the option to disable PS/2 port if you only use USB devices.
- Just in case you are using very old and outdated hardware/operating system, upgrading it is the only option to achieve a fast bootup time.
Did you find this article helpful? Don’t forget to drop your feedback in the comments section below.
Also Read: How To Free Up To 20GB Space After Windows 10 Anniversary Update?


